Thursday, November 1, 2007

Atol de Calabaza (Pumpkin Atole)

I hope you haven't all thrown out those Jack-O-Lanterns cause here's a great way to use up all the scrumptious pumpkin. My sister-in-law, Ana, taught me to make this the first year Armando and I were married and I think we've made it every year since, but this is the first time I've made it all by myself. If you want a definition of atole, go here. In my words it's basically a yummy thick drink made out of anything (generally corn or fruit) - it's kind of like a porridge - watch out three bears, cause this one is delicious!

Here's what I did - (we didn't carve our pumpkin so here's the steps from the beginning). Cut open the pumpkin and remove all seeds and guts.

Slice pumpkin into several small pieces.

Fill a large pot with hot water and place pumpkin pieces in water. Boil until soft. Let pumpkin cool.

If outer shell of the pumpkin is really tough, you may remove it or you can leave the shell on if you think it will blend well. (*Note: I left the shell on a few pieces and it added nice little darker orange specs to the drink, which I liked).

Place as much of the pumpkin in the blender as possible (you may want to slice into smaller pieces) and blend with part of the water it was boiled in).

Mixture will be thick.

Pour pumpkin mixture back into pot and bring to boil with a cinnamon stick or two. Stir often. Add sugar to taste. Then add milk to thin to your preferred thickness - the drink is meant to be somewhat thick.

Stir until milk/pumpkin have blended and drink has heated through. Add a bit of vanilla 1/2 to 1 tsp. Serve warm.

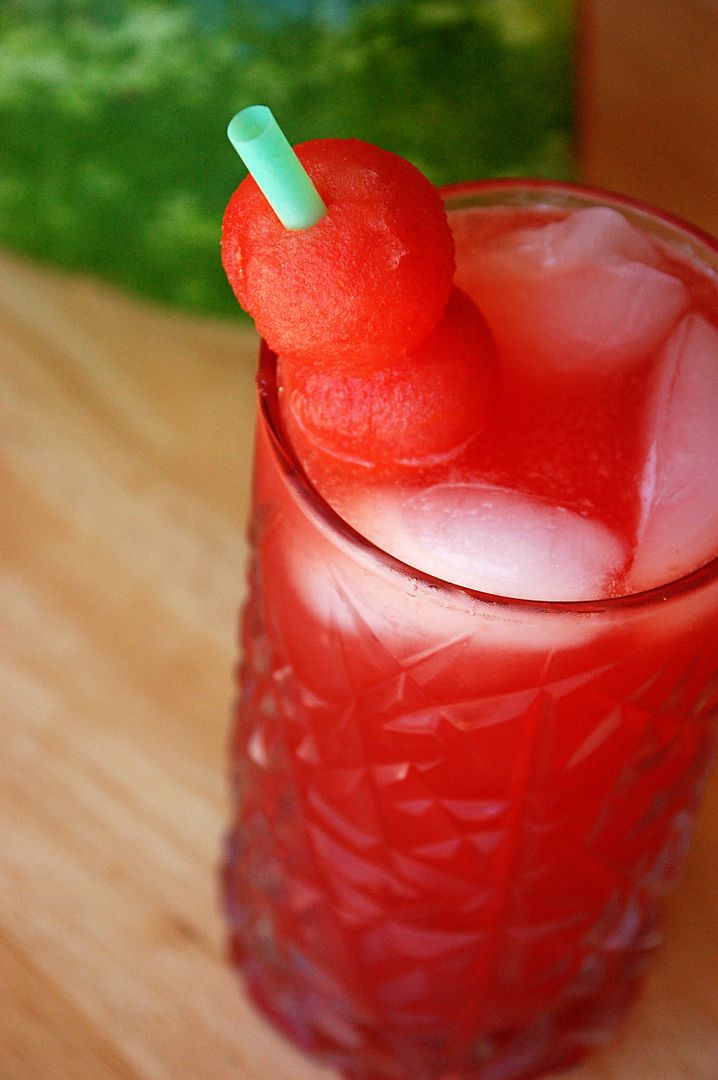
Annie visited the other night and we enjoyed a delicious cup as we talked. I love this season of warm drinks and being inside talking with friends and family. As we talked and I analyzed how it turned out, I thought it would be pretty to serve with a little whip cream on top with a dash of cinnamon for decoration. If you try this, let me know if you like it.

Monday, October 8, 2007

Simple Apple Crisp

I've been craving warm apple crisp with a scoop of Blue Bunny Homemade Vanilla ice cream for weeks now. On Saturday morning I finally made it and we've been enjoying it all weekend long!


You'll need:

5 apples (I like to use a mixture of different types - sweet, soft, crispy, and tart)

Slice and place in an 8x8 baking dish (I like to sprinkle a little cinnamon and sugar on the apples as I go)

Then mix:

2/3 - 3/4 c brown sugar
1/2 cup flour
1/2 cup quick oatmeal
1/3 cup stick butter, softened
3/4 tsp cinnamon
3/4 tsp ground nutmeg


Sprinkle oat/sugar/spice mixture to cover apples. Bake at 350 for 30 minutes or until apples are tender.

Serve warm with a scoop of vanilla ice cream.

This is one of my favorite fall/winter treats! All of the juices from the apples combine together with the cinnamon for a delicious treat!

Saturday, October 6, 2007

Conference Chowder

I have a friend who makes "Conference Chowder" with her family every 6 months for Conference. I tried it this time and really enjoyed it. Here's what I did.

Combine and saute in large cooking pot:

  • 1/2 cup butter
  • 2 carrots sliced
  • 2 stalks celery sliced
  • 2 tomatoes, diced
  • 1 medium onion, quartered or chopped
  • 1/2 cup packed chopped fresh parsley, (OR 2 Tbsp dry)
Prepare the following and set aside to add later:
  • 2 medium zucchinis
  • 1 8oz pkg fresh mushrooms
Add mushrooms at the end of sauteeing other vegetables.

Combine the following and pour over sauteed vegetables, stirring while pouring:


  • 1/3 cup flour
  • 1 Tbsp dried basil
  • 1 Tbsp dried oregano
  • 2 tsp salt
  • 1 tsp ground marjoram
  • 1 tsp ground black pepper (I would recommend less)

Add:

2 cups boiling water
1 can chicken or vegetable broth
2 chicken or vegetable bullion cubes
(I just used 1 large container or chicken broth cause that's what I had on hand)


Simmer for 1 hour

Add the zucchini when there's 15-20 minutes left so they don't turn mush

Add:

13 oz evaporated milk for last 10 minutes.

Enjoy!

Experimenter's note: This recipe has a lot of FLAVOR - I found it to be delicious as a sauce over a fresh baked spaghetti squash. Marcela really enjoyed it like that too. You could serve it as a chowder or as a sauce over pasta. It's delicious and very flavorful!

Friday, September 28, 2007

Homemade Oreos

I stumbled across a recipe for homemade oreos this week and I had a dream about sinking my teeth into them a couple of nights ago, so I convinced my sister Makayla who's visiting this week to make them with me.

Homemade Oreos
Retro Desserts, Wayne Brachman

Makes 25 to 30 sandwich cookies

For the chocolate wafers:
1¼ cups all-purpose flour
½ cup unsweetened Dutch process cocoa
1 teaspoon baking soda
¼ teaspoon baking powder
¼ teaspoon salt
1 to 1½ cups sugar (I only used 1 cup because I liked the contrast of a less-sweet cookie with the sweet center filling)
½ cup plus 2 tablespoons (1¼ sticks) room-temperature, unsalted butter
1 large egg

For the filling:
¼ cup (½ stick) room-temperature, unsalted butter
¼ cup vegetable shortening
2 cups sifted confectioners’ sugar
2 teaspoons vanilla extract

1. Set two racks in the middle of the oven. Preheat to 375 degrees.
2. In a food processor, or bowl of an electric mixer, thoroughly mix the flour, cocoa, baking soda and powder, salt, and sugar. While pulsing, or on low speed, add the butter, and then the egg. Continue processing or mixing until dough comes together in a mass.


3. Take rounded teaspoons of batter and place on a parchment paper-lined baking sheet approximately 2 inches apart. With moistened hands, slightly flatten the dough. Bake for 9 minutes, rotating once for even baking. Set baking sheets on a rack to cool.


4. To make the cream, place butter and shortening in a mixing bowl, and at low speed, gradually beat in the sugar and vanilla. Turn the mixer on high and beat for 2-3 minutes until filling is light and fluffy.

5. To assemble the cookies, in a pastry bag with a 1/2 inch, round tip, pipe teaspoon-size blobs of cream into the center of one cookie. Place another cookie, equal in size to the first, on top of the cream. Lightly press, to work the filling evenly to the outsides of the cookie. Continue this process until all the cookies have been sandwiched with cream. Dunk generously in a large glass of milk.

*A side note - I was disappointed when I tried the first one because they were a lot more firm (like an oreo) than I thought they would be. So I turned down the temperature, made them smaller, and cooked them for less time - for a softer cookie.

They'd also be delicious with ice cream centers!

Tuesday, September 25, 2007

Pastelitos - Honduran Meat-filled Pastries

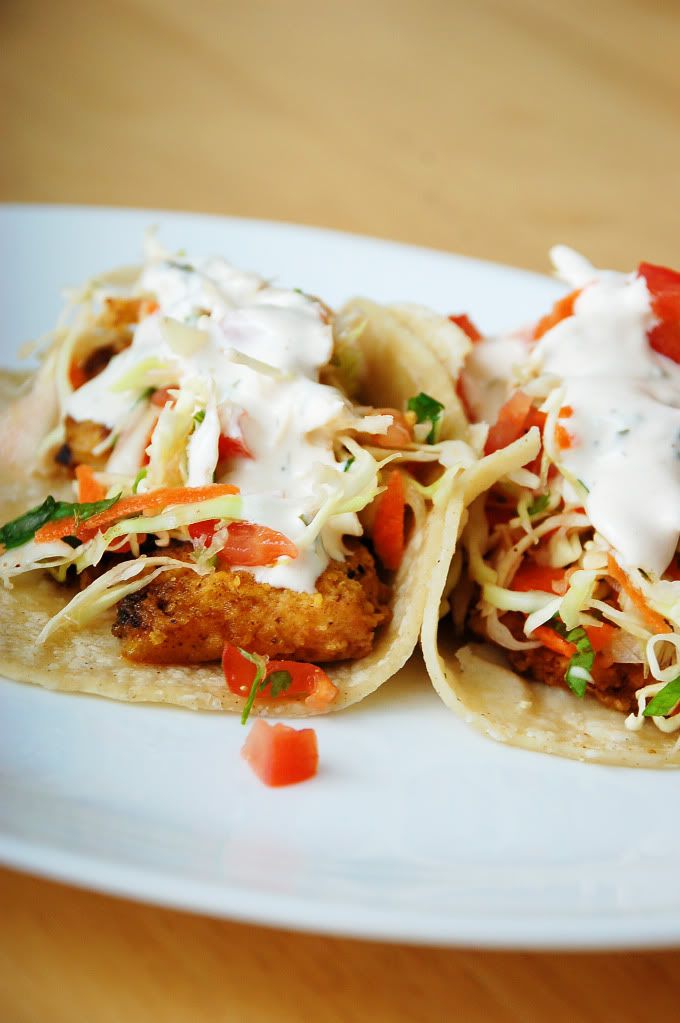
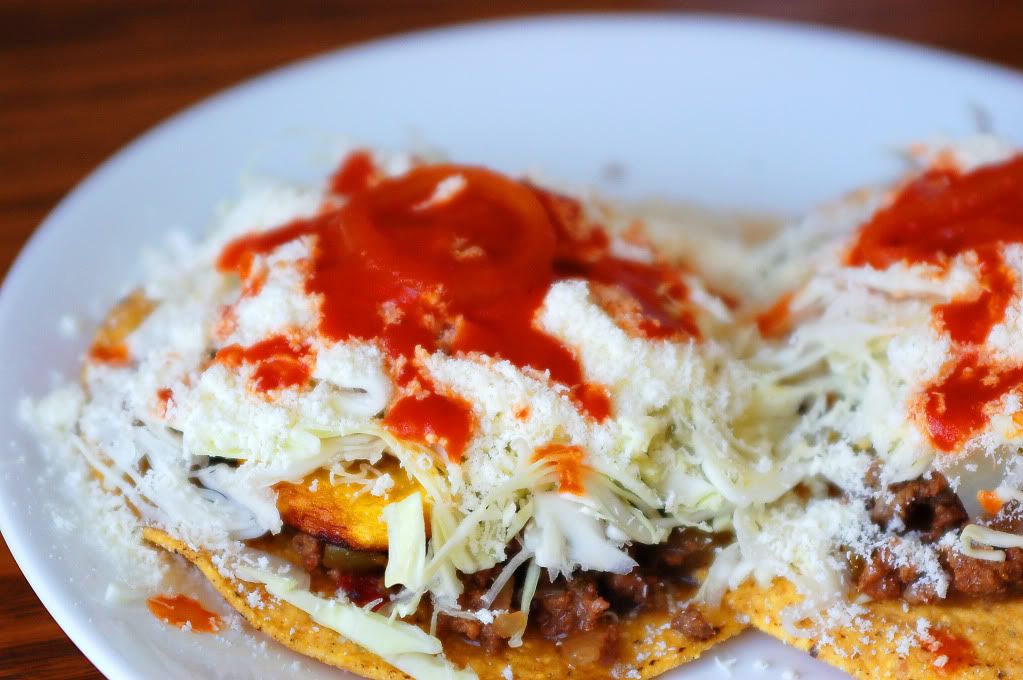
We've been celebrating Honduras at our house this week (lots of deep frying). I'm ready to go on a diet, but before I do, let me just tell you how yummy these things are...crunchy on the outside, soft on the inside, with a delicious cabbage salad on top . . . something that you can indulge in once . . . in a great while!

Our friend, Karen, from Honduras came to help us make "pastelitos" for the multicultural celebration this week. We made about 50 or more of these little puppies and I've still been making them every day with the left-over dough.

This recipe is taken from a cookbook my sister-in-law, Ana, sent me. We had some help making it this weekend so we'll see if the recipe makes sense.

You'll need:

2 C dough prepared with corn flour (maseca)
1/2 tsp "achiote"
1 tsp salt
1 C corn oil
1 C meat filling

Season the dough with salt and add the "achiote." Divide it in 15 portions and make the tortillas 3 inches in diameter.

Place 1 Tbsp meat filling on the bottom half of each tortilla. Fold the tortilla in the form of half-moon. Seal the edges moistening with water, pressuring with the fingers to prevent the filling from coming out.

In a small pan, heat the oil and cook the pastries at medium heat until golden on both sides. Place them over paper towel and serve warm.


Meat filling includes:

1 C ground beef
2 Tbsp corn oil
1/2 c chopped onion
1/4 c chopped ripe tomato
2 garlic cloves, minced
1 C water with 1 Tbsp salt
1/4 tsp ground black pepper
1/2 tsp salt
1/2 tsp thyme
1 tsp Worcestershire Sauce
1/4 tsp hot chili sauce
1 large potato cut into small pieces (we used rice and it was delicious!)

In a medium pan, heat oil and cook the garlic cloves and the onion for 3 minutes or until translucent. Add the meat and cook stirring constantly so it does not cluster. Cook the potato in the salt water until tender then add it to the meat with any remaining water. Add the tomato and season with pepper, salt, thyme, Worcestershire and the hot chili sauce. Cover and simmer for 20 minutes. Uncover the pot and cook at medium heat until the water consumes completely. Place in the refrigerator to cool.

Top pastries with a salad of finely chopped cabbage, pico de gallo or a warm and spicy tomato sauce, and dry cheese.

Tuesday, September 18, 2007

Chocolate Raspberry Creme Cake

We invited some friends for dinner and they surprised us with the most delicious dessert. First of all Christina is a natural at inventing things in the kitchen. Here's what she did:

She baked a regular chocolate cake mix in a bundt cake pan. Then she mixed some raspberry jello mix and when she pulled the cake from the oven and removed it from the pan, she pierced it with a fork several times and poured the unset jello mixture over the top and put it in the refrigerator to soak in and set up.


Then, she served it with a freshly whipped spoonful of whipping cream and WOW, we were in heaven! Thanks Christina!

Lindy's Chicken Enchiladas

These are the best enchiladas I've ever tried and I must give credit to my old neighbor and dear friend, Lindy. She taught me how to make them and I am so grateful.

Ingredients:

1 small onion, chopped

vegetable oil

garlic salt

2 cups cooked chicken, shredded

2-3 small cans enchilada sauce (I use 1 (or 2) red and 1 green)

1 lb. grated cheese (Monterey Jack and/or cheddar)

12-18 corn tortillas

Instructions:

Turn oven to 350 degrees. Chop onion and cook in an oiled frying pan until translucent.

Mix enchilada sauce in a shallow bowl and stir. Set aside.

Add shredded chicken to onions and heat through (sprinkle with a little garlic salt and add 1/2 cup or so of enchilada sauce.) Transfer chicken mixture to a plate or bowl and wash frying pan (or leave it and use a second one). Heat pan on medium high and coat with oil. Fry corn tortillas one at a time, just a few seconds on each side - softening them. You may have to add more oil after every 3 tortillas. Once the tortillas are done, assemble the enchiladas as follows:

First, dip the softened tortillas in the sauce.

Then fill with a little chicken and shredded cheese.

Roll and place seam side down in greased baking pan.

Drizzle remaining sauce over enchiladas.

Sprinkle with plenty of cheese and bake at 350 for about 20 minutes or until heated through.

Serve with refried [black] beans, rice, and a side salad.

Friday, September 14, 2007

Garden Fresh Chicken Tacos

My dear friend Emily had Marcela and I over for lunch last week. She's been working in her garden all summer and our lunch was filled with the delicious fruits (and veggies) of her harvest. She sent us home with the most delicious bunch of tomatoes and Italian Cucumbers (which are GIGANTIC). We had chicken tacos with fresh veggies and fresh peaches with vanilla-bean ice cream on top. Unfortunately we ate that so fast, I didn't get a picture, but I'm sure you can envision it. Here's how she did the Tacos:

Place 1 lb. boneless skinless chicken breast in a crockpot with taco seasoning and a little bit of water. Cook and shred.

Heat both sides of corn tortillas on skillet with a tiny bit of olive oil.

Dice the following: (most delicious if the ingredients come fresh from someone's garden!)
Tomatoes
Cucumbers
Green Peppers
Spinach Leaves
(I might add fresh cilantro if I had some on hand)

Top with shredded cheese and a dollop of sour cream and ENJOY!

Thanks Emily! I'm still enjoying all the fruits and veggies you shared with us!

I love Harvest Season!

Tuesday, September 11, 2007

Super-Moist Banana Bread

I like my bananas a little green . . . unless I'm making banana bread, then the darker and mushier the better. Armando has always wished I made banana bread like they do in Honduras and I had never sampled anything like that (at least I didn't think I had) until our friend Christina dropped by the other day with a warm surprise - a freshly baked loaf of banana bread. When Armando tried it, he said, "THIS is what banana bread is!" So, thanks to Christina, we've adopted a new recipe in our family. I thought I'd share.

3 or 4 ripe or overripe bananas, mashed
1/4 cup butter
1 egg
1 cup sugar
1 1/2 cup flour
1/2 tsp baking powder
1/4 tsp salt
1/2 cup sour milk (1/2 Cup milk + 1/2 Tbsp lemon juice-let sit for 2 minutes)

Mix all ingredients above adding the milk last, then pour batter into greased loaf pan. Bake for approximately 1 hour at 350 deg. (I baked mine for 70+ minutes)

Christina notes that she likes to add coconut and fresh pineapple but you can also add nuts or chocolate chips to taste. I personally like cinnamon and walnuts in mine and I think I'll try that next time.


Friday, September 7, 2007

A No Fail Fish Marinade

I apologize to all of you who check this site regularly and have found nothing for . . . too long. Life has been busy, but I think I may have time to add to this a little more often and I've also been thinking that I'd like to invite any of you who have found great recipes and tried them out to snap a picture next time you make the dish and send it along with the recipe and I'll highlight it on my blog. That way this site can be a great resource for all of us looking for new ideas. Anyway, I came across this TO DIE FOR marinade recipe on Stormy's blog and we tried it. It's one I'll refer to again and again - we LOVED it! Thanks for sharing Stormy.


Lime-Marinated Broiled Tilapia (The original recipe was Salmon)

Ingredients

1/3 cup low-sodium soy sauce
1/4 cup fresh lime juice
1 teaspoon minced peeled fresh ginger
1/2 teaspoon chopped fresh thyme
2 garlic cloves, chopped
4 (6-ounce) skinless Tilapia fillets (about 1 inch thick)
Cooking spray
4 lime wedges

Preparation

Place first 5 ingredients in a blender; process until smooth. Pour into a large zip-top plastic bag. Add salmon, and seal and marinate in refrigerator 1 hour, turning bag occasionally. (I marinated it over night and it was great!)

Preheat broiler.

Remove salmon from bag, discarding marinade. Place salmon on a broiler pan coated with cooking spray; broil 8 minutes. Turn, and broil an additional 4 minutes or until fish flakes easily when tested with a fork. Serve with lime wedges.

Yield

4 servings (serving size: 1 fillet and 1 lime wedge)

Nutritional Information

CALORIES 281(42% from fat); FAT 13.1g (sat 3.1g,mono 5.7g,poly 3.2g); PROTEIN 36.8g; CHOLESTEROL 87mg; CALCIUM 25mg; SODIUM 414mg; FIBER 0.1g; IRON 0.8mg; CARBOHYDRATE 7.9g

Cooking Light, MAY 2003

Mango Salsa

Just in case you're looking for a good compliment to any fish dish - try this mango salsa.

2 mangos, cut into small cubes

½ can pineapple chunks chopped *(I prefer fresh pineapple)

½ bunch of cilantro leaves chopped

½ red onion, chopped

juice of 1 lime

olive oil to taste

salt and freshly ground pepper

A little honey to drizzle on top.

Combine all ingredients and serve with fish or chicken and a side of rice.


Tuesday, August 14, 2007

What's a tomatillo?

I've had lots of questions about what a tomatillo is lately because it's a key ingredient in the salad dressing for a Mexican Chicken Salad I shared a few weeks ago.

Look for a tomato with a husk like this next time you're in the produce section of the grocery store - it's often by the jalepeños and other peppers used in latin-american cooking. (Although it's not really spicy)


Here's what Wikepedia says about the tomatillo:

The tomatillo (Physalis ixocarpa or Physalis philadelphica) is a small, spherical and green or green-purple fruit surrounded by a paper-like husk formed from the calyx. As the fruit matures, it fills the husk and can split it open by harvest. The husk turns brown, and the fruit can be any of a number of colors when ripe, including yellow, red, green, or even purple[1]. Tomatillos are the key ingredient in fresh and cooked Latin American green sauces. The freshness and greenness of the husk is a quality criterion. Fruit should be firm and bright green as the green colour and tart flavour are the main culinary contributions of the fruit.

The tomatillo is also known as the husk tomato, jamberry, husk cherry, mexican tomato, or ground cherry, although these names can also refer to other species in the Physalis genus. In Spanish it is called tomate de cáscara, tomate de fresadilla, tomate milpero, tomate verde ("green tomato"), tomatillo (Mexico [this term means "little tomato" elsewhere]), miltomate (Mexico, Guatemala), or simply tomate (in which case the tomato is called jitomate). Even though tomatillos are sometimes called "green tomatoes", they should not be confused with green, unripe tomatoes. Other parts of the tomatillo plant also contain toxins, and should not be eaten.

Fresh ripe tomatillos will keep in the refrigerator for about two weeks. They will keep even longer if the husks are removed and the fruits are placed in sealed plastic bags stored in the refrigerator. They may also be frozen whole or sliced.

And if any of you haven't tried that Mexican Chicken Salad, yet, click here, cause you're missing out!

Tuesday, July 31, 2007

Veggie Lasagne

Do you have some extra produce/veggies and you aren't sure what to do with them? Try this vegetable lasagne - you can use any vegetable you like. This is what I came up with:

Ingredients:

15 oz. ricotta cheese
4 cups mozzarella cheese
Parmesan cheese
1 egg
oregano
9 oven-ready lasagne noodles (that way you don't have to boil them)
Sliced carrots
Sliced onion
1-2 cloves minced garlic
1 small can sliced olives
Sliced mushrooms
Sliced zucchini
Sliced green pepper
1 15 oz can diced tomatoes
1-1 1/2 cups chopped broccoli
1 cup of your favorite vegetarian spaghetti sauce
basil.


Instructions:
Combine ricotta cheese with egg and 1/2 cup mozzarella, 1/4 cup Parmesan, and a dash or two of oregano. Add chopped broccoli and mix. Set aside. Slice and chop remaining vegetables. With a little butter or olive oil, saute remaining vegetables beginning with onion and garlic, then add carrot, a dash or basil and oregano- cooking for a couple or three minutes before adding mushrooms, green pepper, olives, tomatoes and finally zucchini (this doesn't take long to cook.) Don't cook the vegetables until they are completely done as they will still cook when you heat them in the lasagne. Add a little of your favorite spaghetti sauce to the vegetables.


Place a small amount of spaghetti sauce (just to moisten and cover) on the bottom of a 9 x 13 baking dish. Place 3 noodles on top. Spread 1/3 of the ricotta mixture across noodles (it may not look like a lot). Add 1/3 of vegetable/sauce mixture across ricotta mixture. Sprinkle with mozzarella. Follow these steps two more times and top off with mozzarella. Bake covered for approximately 40 minutes. Remove foil the last 10 minutes of baking to help melt the cheese. Let stand for 10-20 minutes before serving.

P.S. I forgot to take a picture of the final product, so here's one of the middle of the process.

Monday, July 30, 2007

Cantaloupe Blend

Do you have a cantaloupe that's just a little too ripe (or way too ripe)? Or even a cantaloupe that you cut into that's underripe? Here's a delicious solution to tossing it - blend it and drink it!


Remove seeds and rind from cantaloupe.
Cut into 1-2 inch pieces
Fill blender 1/2 to 3/4 full of cantaloupe


Add water to just above fruit line
Add plenty of ice cubes
Add sugar to taste (depending on the ripeness of the fruit) or if you add less water, this is even good without sugar! Blend until smooth and enjoy! *This drink is even more delicious after being refrigerated for awhile.

Sunday, July 29, 2007

Zucchini Bread (Fruit or Veggie Sweet Bread)

I love looking through my old cookbook full of recipes I've gathered through the years. I have to be careful though cause all the pages are falling out. Each recipe takes me to a different time and place where I shared good times with friends and family. Just this week, I was looking through my book and remembering my dear friend, Katja. (Don't you think we look alike? Everyone we met thought that Annie (my real sister) and I were Katja's sister) Anyway, Katja was an amazing cook and seemed to be able to do just about anything without a recipe - just a dash more of this and a pinch more of that and waaalaaa a delectable masterpiece!


This time of year most of us have a home-grown zucchini laying around (even if we don't have a garden) and need something to do with it. There's lots of creative recipes out there, but this week I decided to go with the traditional zucchini bread. It was delicious! Thanks Katja!

The thing that I love about this recipe is that it can be any kind of bread - read below for different variation ideas.


Stir together the following ingredients:

3 cups flour
1 tsp salt
1 tsp baking soda
1/2 tsp baking powder
2 tsp cinnamon
1 c chopped nuts (optional)

Beat the following till well blended:

3 eggs
1 1/2 cups sugar
1 cup oil

Stir in 1 tsp of vanilla and one of the following:

a) 2 cups coarsley shredded zucchini OR
b) 2 cups chopped seeded & peeled tomatoes OR
c) 2 cups shredded apples & 1 tsp lemon juice OR
d) 1 Tbsp grated orange peel cobined with 1 cup mashed banana & 1 finely chopped orange equalling 2 cups

Pour into greased and floured loaf pans. Bake 50-60 minutes in preheated 350 degree oven. Let stand for 10 minutes, then turn out on rack to cool. Makes 2 loaves.